Kodak PROFESSIONAL LED II 20P User Manual
Browse online or download User Manual for Air purifiers Kodak PROFESSIONAL LED II 20P. Kodak PROFESSIONAL LED II 20P User Manual
- Page / 198
- Table of contents
- TROUBLESHOOTING
- BOOKMARKS
- ©Eastman Kodak Company, 2000 2
- Regulatory Information 3
- Safety Regulations 4
- Environmental Regulations 5
- Warranty Information 6
- Table Of Contents 7
- About This Guide 13
- About Other Publications 14
- Getting Help from Kodak 15
- 1 Introduction 17
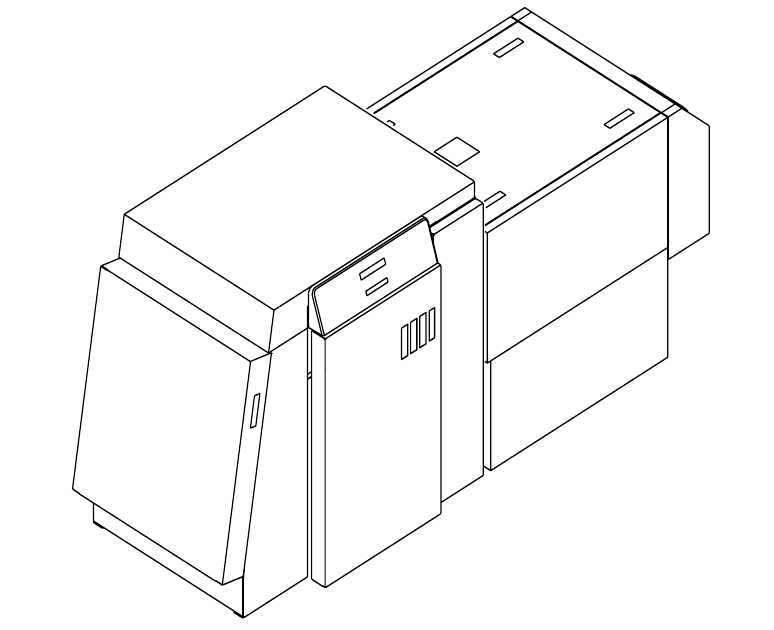
- Equipment Overview 18
- Rear View 19
- 2 Using the System 21
- Starting up the Printer 22
- Calibrating the Printer 23
- 2-4 September 2000 24
- September 2000 2-5 25
- Obtaining Densities 26
- Completing the Calibration 27
- 2-8 September 2000 28
- Making Prints 29
- Shutting Down the Processor 30
- Shutting Down the Printer 31
- 2-12 September 2000 32
- September 2000 3-1 33
- Operating the Printer 34
- OCP Key/Light Descriptions 35
- Printer Offline Feature 36
- Online Mode 36
- Offline Mode 36
- Cancelling Jobs 36
- Status Messages 37
- 3-6 September 2000 38
- 3-8 September 2000 40
- screw lock 41
- 3-10 September 2000 42
- September 2000 3-11 43
- 3-12 September 2000 44
- September 2000 3-13 45
- Removing the Chad 46
- Shutdown and Restart 47
- Unload Supply 47
- Selecting SCSI Ports 47
- Managing a Modem 48
- Setting the Paper Length 49
- represents the cut edge 50
- Setting the Page Starts Value 51
- Producing Borderless Prints 52
- September 2000 3-21 53
- 3-22 September 2000 54
- Resetting the Defaults 55
- About Printing 56
- September 2000 3-25 57
- Operating the Processor 58
- OCP On/Off Light 61
- Operational Modes 62
- Adjusting the Key Switch Lock 63
- • Locked—Operator mode 63
- • Unlocked—Key Operator mode 63
- Processing a Control Strip 64
- Setting the Current Time 65
- Setting the Current Date 65
- Viewing the On/Off Times 66
- Setting the On/Off Times 66
- Calibrating the Temperatures 67
- Measuring the Flow Rate 68
- Managing the Development Time 69
- Managing the Material Sensors 70
- Computer Reset 71
- Loading the Default Values 72
- Clearing Error Conditions 73
- 4 Maintaining the Equipment 75
- Maintaining the Printer 76
- Periodic Maintenance 77
- Maintaining the Processor 78
- September 2000 4-5 79
- Operational Checks 80
- Weekly Maintenance 81
- splash guard 82
- top rollers 82
- light tight cover 83
- developer entrance guide 83
- feed table 83
- entrance sensors 83
- Monthly Maintenance 85
- 4-12 September 2000 86
- Adding New Chemistry 88
- September 2000 4-15 89
- September 2000 5-1 91
- Printer Error Messages 92
- Printer Paper Path 93
- Clearing Printer Paper Jams 101
- Processor Error Messages 106
- Clearing Error Messages 107
- Clearing a Reset Message 107
- Clearing Processor Paper Jams 108
- Clearing Drive Errors 108
- Calibration Troubleshooting 109
- Calibration Error Codes 110
- Non-Numeric Error Messages 116
- Getting Additional Help 117
- Appendix A: Ordering Supplies 119
- Standard (U.S.) Paper 120
- Metric Paper 120
- Processor Chemicals 121
- Publications 121
- Appendix B: Specifications 123
- Site Requirements 124
- Plumbing 125
- Electrical 126
- Power Cords 127
- Power Outlets 127
- Line Frequency 128
- Specifications 129
- Line Voltage 131
- Operating Environment 132
- Wash Chemicals 133
- Telephone line 133
- Densitometer 133
- SCSI Cable 134
- Information 135
- Installation Procedure 136
- September 2000 C-3 137
- C-4 September 2000 138
- September 2000 C-5 139
- Adding a Device 140
- September 2000 C-7 141
- Editing the Log Settings 142
- Updating a Device 143
- Deleting a Device 144
- Viewing Graphs 145
- Value Graph 146
- Difference Graph 147
- History Graph 148
- Sending LUTs 149
- C-16 September 2000 150
- Sending Targets 151
- WINDOWS NT Version 152
- MACINTOSH Version 153
- C-20 September 2000 154
- September 2000 C-21 155
- C-22 September 2000 156
- September 2000 C-23 157
- C-24 September 2000 158
- September 2000 C-25 159
- C-26 September 2000 160
- (Macintosh) Tab 161
- C-28 September 2000 162
- September 2000 C-29 163
- C-30 September 2000 164
- September 2000 C-31 165
- File Formats 166
- Installing the Densitometer 167
- Server Software 169
- Using the Image Print Server 170
- Suspending and Resuming 171
- Failed Jobs 171
- Attended Operation 171
- Enqueue Example 172
- September 2000 D-5 173
- Print Server Software 174
- Option Descriptions 175
- Enqueue Dialog Box 176
- Description 178
- Export Module 179
- Installing the Software 180
- Printing Images 181
- E-4 September 2000 182
- September 2000 E-5 183
- KODAK LED Main Dialog Box 184
- Punch Attributes 185
- Page Layout Attributes 186
- Printer Status Dialog Box 187
- Troubleshooting 188
- Other Problems 189
- September 2000 Index-1 191
- Index-2 September 2000 192
- September 2000 Index-3 193
- Index-4 September 2000 194
- September 2000 Index-5 195
- Index-6 September 2000 196
- 198
Summary of Contents
KODAK PROFESSIONAL LED II Printer 20PKODAK PROFESSIONAL LED II Processor Operator’s Guide
x September 2000Monthly Maintenance ... 4-11Main Drive
Diagnostics and Troubleshooting5-10 September 2000Miscellaneous Printer Error MessagesMiscellaneous error messages indicate that a problem with the pr
Diagnostics and TroubleshootingSeptember 2000 5-11Clearing Printer Paper JamsOpen the front door and front sheet transport door on the printer.To remo
Diagnostics and Troubleshooting5-12 September 2000Troubleshooting Observable ErrorsObservation Possible Cause Possible Solution• The printer is diffic
Diagnostics and TroubleshootingSeptember 2000 5-13The vacuum reduction insert is damaged and causing noise in the printer.• The vacuum reduction inser
Diagnostics and Troubleshooting5-14 September 2000The host computer and the printer are not communicating correctly.The SCSI cable has been disturbed.
Diagnostics and TroubleshootingSeptember 2000 5-15Additional Troubleshooting Tips for the Printer• Check that the processor is turned ON and warmed up
Diagnostics and Troubleshooting5-16 September 2000Processor Error MessagesTwo types of messages appear on the OCP for the processor:• Error Messages—I
Diagnostics and TroubleshootingSeptember 2000 5-17Clearing Error MessagesTo clear an error or warning message from the OCP, the condition causing the
Diagnostics and Troubleshooting5-18 September 2000Clearing Processor Paper JamsIMPORTANT: See "Clearing Printer Paper Jams" on page 5-11 to
Diagnostics and TroubleshootingSeptember 2000 5-19Additional Troubleshooting Tips for the ProcessorYou can avoid many error conditions by following th
September 2000 xiAppendix B: Specifications...
Diagnostics and Troubleshooting5-20 September 2000Calibration Error CodesError CodeError Code /Status MessagePossible Cause/Subsystem Possible Solutio
Diagnostics and TroubleshootingSeptember 2000 5-21106 The following device is closed:_devicename_.The serial port closed during system reading.• Verif
Diagnostics and Troubleshooting5-22 September 2000118 A SCSI ID for the following device was not found: _devicename_.SCSI driver not found. Reinstall
Diagnostics and TroubleshootingSeptember 2000 5-23601 A bad count was entered. The expected count was:_count_.• A file was edited manually and an inco
Diagnostics and Troubleshooting5-24 September 2000910 Configuration file field:_filename_is invalid. Calibration will be cancelled.The user manually e
Diagnostics and TroubleshootingSeptember 2000 5-251101 Density DMIN/DMAX points are invalid.Density points are invalid. Reread density values on densi
Diagnostics and Troubleshooting5-26 September 2000Non-Numeric Error MessagesError Message Possible Cause/Subsystem Possible SolutionAn underrun error
Diagnostics and TroubleshootingSeptember 2000 5-27Getting Additional HelpYour Kodak Sales Representative is the best source for information about the
September 2000 A-1Appendix A: Ordering SuppliesThis appendix includes ordering information for Kodak accessories, supplies, paper, chemicals and publi
Appendix D: Using the Image Print Server Software... D-1Installing the IPS
Ordering SuppliesA-2 September 2000Standard (U.S.) PaperPurchase these items through your Kodak representative. Metric PaperPurchase these items throu
Ordering SuppliesSeptember 2000 A-3Processor Chemicals Purchase these items through your Kodak dealer or distributor. PublicationsCall 1-800-431-7278
September 2000 B-1Appendix B: SpecificationsThis appendix includes specifications and site requirements information for the printer and processor.Prin
SpecificationsB-2 September 2000Site RequirementsOperator and Service AccessWhen fully assembled the equipment requires a minimum of 91 cm(36 in.) on
SpecificationsSeptember 2000 B-3PlumbingNOTE: Always adhere to local ordinances and regulations for wastewater disposal.A plumbed processor with a wat
SpecificationsB-4 September 2000ElectricalThe KODAK PROFESSIONAL LED II Printer 20P and the KODAK PROFESSIONAL LED II Processor are manufactured to op
SpecificationsSeptember 2000 B-5Power CordsA 2.4 m (8 ft.), grounded power cord with a special three prong plug is provided with your printer. In addi
SpecificationsB-6 September 2000Line FrequencyIn most cases, the electric utility company is responsible for maintaining the proper frequency of the a
SpecificationsSeptember 2000 B-7Printer Power Receptacles (Europe)LN16A16ALN2(1.5 mm )ORCEE (7)250,16A250,16ACEE (7)PinNEUTRAL BUSGROUND BUS(Isolate
September 2000 xiiiAbout This GuideThis is a User’s Guide for the KODAK PROFESSIONAL LED II Printer 20P and the KODAK PROFESSIONAL LED II Processor. I
SpecificationsB-8 September 2000Processor Power Receptacles (Europe)32A, 5 Pin, 230-400VACICE Connector 30932A, 3 pin, 230VACICE Connector 30916A16A16
SpecificationsSeptember 2000 B-9Line VoltageThe printer and processor operate satisfactorily over a range of voltages around the nominal voltage.The l
SpecificationsB-10 September 2000Operating EnvironmentIf the environmental temperature changes more than 3o Celsius (5o Fahrenheit) since the printer
SpecificationsSeptember 2000 B-11Processor Humidity SpecificationsIf the humidity is low (approximately 15 - 20%), check the chemistry levels in the t
SpecificationsB-12 September 2000SCSI CableA single-ended or differential-ended SCSI cable is required to connect the host computer to the printer. In
September 2000 C-1Appendix C: Additional CalibrationInformationThe topics covered in this section include: • Installing the Calibration Software• An o
Additional Calibration InformationC-2 September 2000Installation Procedure1. Place the supplied CD-ROM in your CD-ROM drive.2. When the Browser appea
Additional Calibration InformationSeptember 2000 C-36. Select the installation type:For Windows NT systems, select one of the following:• Typical inc
Additional Calibration InformationC-4 September 2000Kodak Device Calibration SoftwareThe Kodak Device Calibration Software is used to launch the Calib
Additional Calibration InformationSeptember 2000 C-5The table below defines the functions and their corresponding icons on the main window of the KODA
About This Guidexiv September 2000About Other Publications The following publication is included with the printer:Quick Reference Guide for the KODAK
Additional Calibration InformationC-6 September 2000Starting the Kodak Device Calibration SoftwareLoad the Calibration Software according to the table
Additional Calibration InformationSeptember 2000 C-7The Create a New Device dialog box appears.2. Enter the correct device settings. Use a unique ide
Additional Calibration InformationC-8 September 2000Editing the Log Settings To change the log settings for the KODAK Device Calibration:1. Deselect a
Additional Calibration InformationSeptember 2000 C-9Updating a Device To update or change the device name or the SCSI ID for any device:1. Select the
Additional Calibration InformationC-10 September 2000Deleting a Device To delete a device from the KODAK Device Calibration Software screen:1. Select
Additional Calibration InformationSeptember 2000 C-11Advanced Features of the LED II Calibration SoftwareThe Calibration Software for the KODAK PROFES
Additional Calibration InformationC-12 September 2000Value Graph
Additional Calibration InformationSeptember 2000 C-13Difference Graph
Additional Calibration InformationC-14 September 2000History Graph To view calibration graphs: 1. From the KODAK Device Calibration screen, double-cli
Additional Calibration InformationSeptember 2000 C-15The LED Calibration Application screen appears.2. Click the Graphs icon. One of the graphs appear
About This GuideSeptember 2000 xvGetting Help from KodakYour Kodak sales representative is the best source for information about setting up and operat
Additional Calibration InformationC-16 September 2000The LED Calibration Application screen appears.2. Click the Send LUT icon. The Send LUT to Printe
Additional Calibration InformationSeptember 2000 C-17Sending TargetsThe Send Target feature enables you to send any properly formatted target file to
Additional Calibration InformationC-18 September 2000The Send Target to Printer dialog box appears. (Both the Windows NT and Macintosh versions are sh
Additional Calibration InformationSeptember 2000 C-19MACINTOSH Version3. Enter the desired settings and click OK to save the settings (or Cancel to k
Additional Calibration InformationC-20 September 2000The LED Calibration Application screen appears.2. Click the Edit icon. The Edit Configuration scr
Additional Calibration InformationSeptember 2000 C-213. To navigate among the tabs, click the tab you want and follow the instructions for updating t
Additional Calibration InformationC-22 September 2000Editing Information on the Procedure TabThe Procedure tab contains general configuration attribut
Additional Calibration InformationSeptember 2000 C-23To edit the configuration information on the Procedure tab:1. Use the drop-down lists to change t
Additional Calibration InformationC-24 September 2000Editing Information on the Density Source TabThe Density Source tab specifies how the calibration
Additional Calibration InformationSeptember 2000 C-25Editing Information on the Aim TabThe Aim tab specifies:• whether the aims used for calibration a
Additional Calibration InformationC-26 September 2000Editing Information on the History TabThe History tab specifies information about maintaining cal
Additional Calibration InformationSeptember 2000 C-27Editing Information on the Paper TabThe Paper tab allows you to specify the paper being calibrate
Additional Calibration InformationC-28 September 2000Editing DP2 Information (WINDOWS NT Systems)When you click the DP2 tab of the Edit Configuration
Additional Calibration InformationSeptember 2000 C-29Editing KPIS Information (Macintosh Systems)If you are using the calibration output files with th
Additional Calibration InformationC-30 September 2000The display shows the Edit Configuration screen with the default settings for KPIS Location and K
Additional Calibration InformationSeptember 2000 C-31The display shows the updated Edit Configuration screen with updated File Location of CalDisk:Com
Additional Calibration InformationC-32 September 2000Creating a Density File for Use with CalibrationDuring calibration, you have the option of obtain
Additional Calibration InformationSeptember 2000 C-33Installing the DensitometerThis section describes how to install the X-RITE DTP 36 Densitometer,
September 2000 D-1Appendix D: Using the Image PrintServer SoftwareThis section describes how to use the KODAK PROFESSIONAL Image Print Server Software
September 2000 1-11 IntroductionThis chapter includes the following information about the KODAK PROFESSIONAL LED II Printer 20P and the KODAK PROFES
Using the Image Print Server SoftwareD-2 September 2000Installing the Software1. Insert the IPS Software CD into the CD-ROM drive.2. Double-click on t
Using the Image Print Server SoftwareSeptember 2000 D-3Suspending and ResumingWhen the IPS application begins execution, it searches the current direc
Using the Image Print Server SoftwareD-4 September 2000Enqueue Example1. Select File->Enqueue from the menu bar for the main application screen
Using the Image Print Server SoftwareSeptember 2000 D-5The Enqueue dialog box appears.2. Type a file name into the Image File text box or click the B
Using the Image Print Server SoftwareD-6 September 2000Dialog Boxes and Print OptionsThis section describes the dialog boxes and print options for the
Using the Image Print Server SoftwareSeptember 2000 D-7Option DescriptionsThe main window allows you to choose the following options:Menu Access Butto
Using the Image Print Server SoftwareD-8 September 2000Enqueue Dialog Box Option DescriptionsThe selections/options that you can make from the Enqueue
Using the Image Print Server SoftwareSeptember 2000 D-9Source Directory Preferences Dialog Box Option DescriptionsThe selections/options that you can
Using the Image Print Server SoftwareD-10 September 2000Initialize Default Parameters Dialog BoxDescriptionThis dialog box appears if you press the Re
September 2000 E-1Appendix E: Using the PHOTOSHOPExport ModuleThis appendix describes how to use the Export Module for PHOTOSHOP on MACINTOSH Systems
Introduction1-2 September 2000KODAK PROFESSIONAL LED II ProcessorThe KODAK PROFESSIONAL LED II Processor is designed as a companion processor for the
Using the PHOTOSHOP Export ModuleE-2 September 2000Installing the Software1. Open the Adobe Photoshop folder on your computer.The Adobe Photoshop wind
Using the PHOTOSHOP Export ModuleSeptember 2000 E-36. Click and drag the KODAK LED Printer plug-in icon and Media Files over the Adobe Photoshop Plug
Using the PHOTOSHOP Export ModuleE-4 September 2000To select another printer:1. Click Select.The Select a KODAK LED Printer dialog box appears.2. Sel
Using the PHOTOSHOP Export ModuleSeptember 2000 E-5The KODAK LED Printer main dialog box appears.4. Make the remaining print option choices to meet t
Using the PHOTOSHOP Export ModuleE-6 September 2000Dialog Boxes and Print OptionsThis section describes the dialog box that allows you to specify prin
Using the PHOTOSHOP Export ModuleSeptember 2000 E-7Other optionsThe other selections you can make from the KODAK LED Printer main dialog box include t
Using the PHOTOSHOP Export ModuleE-8 September 2000 Page Layout AttributesOption DescriptionsThe Page Layout Attributes group box allows you to manipu
Using the PHOTOSHOP Export ModuleSeptember 2000 E-9Option DescriptionsThe following are descriptions of the options in the Select a KODAK LED Printer
Using the PHOTOSHOP Export ModuleE-10 September 2000Option DescriptionsThe following are descriptions of the options in the Printer Status dialog box:
Using the PHOTOSHOP Export ModuleSeptember 2000 E-11There are no printers found attached to the host computer. Check the connections and power to each
IntroductionSeptember 2000 1-3 Rear View back doorsheet transport door (rear)portsconnector processorpanel for theoperator control
September 2000 Index-1Aaccess, operator and service B-2activate DP2, attribute in configuration file C-28activate KPIS, attribute in configuration fil
IndexIndex-2 September 2000datesetting, printer 3-17viewing/setting, processor 3-33defaults, processor 3-39deferred jobs, printing 3-4deleting a calib
IndexSeptember 2000 Index-3interface, SCSI 1-1IPSattended operation D-3dialog boxes and print options D-6enque dialog box D-8enqueue D-4failed jobs D-
IndexIndex-4 September 2000operatingenvironment B-10the processor 3-26operational checks, processor 4-6operatoraccess B-2mode 3-30operator control pan
IndexSeptember 2000 Index-5status messages 3-28tanks, cleaning 4-13testing 4-6troubleshooting tips 5-19weekly maintenance 4-7processor in control, att
IndexIndex-6 September 2000supply cassettesinstalling 3-10loading paper 3-7removing 3-6Ttank cover, cleaning 4-12tanks, cleaning 4-13target pad read o
EASTMAN KODAK COMPANYRochester, New York 14653U.S.A.KODAK CANADA INC.Toronto, Ontario M6M 1V3CanadaKodak, Portra, Supra, Gold, Ektacolor, Prime and Ko
©Eastman Kodak Company, 2000All rights reserved. Contents of this publication may not be reproduced in any form without permission from Eastman Kodak
September 2000 2-12 Using the SystemThis chapter explains how to use the KODAK PROFESSIONAL LED II Printer 20P and the KODAK PROFESSIONAL LED II Pro
Using the System2-2 September 2000WARNING: When handling or mixing chemical solutions, wear protective eyewear, clothing, and gloves. For safe handing
Using the SystemSeptember 2000 2-3Calibrating the PrinterYou need to calibrate the printer when you start the system up each day. You also need to cal
Using the System2-4 September 2000The LED Calibration screen appears.3. Click the Go icon to start the calibration cycle. Downloading LUTs and Sending
Using the SystemSeptember 2000 2-5The Send LUT to Printer screen appears.NOTE: The highlighted LUT in the dialog box above is the most recent calibrat
Using the System2-6 September 2000The system automatically downloads the LUT file to the printer to create a test print. When the test print has been
Using the SystemSeptember 2000 2-73. Slide the lever on the densitometer to position 30. Align the edge of the test print with the lever on the densi
Using the System2-8 September 2000If the print densities are out of tolerance, a graph appears, allowing you to select the type of data and planes tha
Using the SystemSeptember 2000 2-9b. Select one of the four options to try to complete the calibration successfully. • If the Out of Tolerance dialog
Regulatory InformationRadio Frequency InterferenceThe United States (47 CFR Part 15 Subpart B, FCC Class A, EMC)This equipment has been tested and fou
Using the System2-10 September 2000Shutting Down the ProcessorTo shut down the processor, press the On/Off key on the processor OCP. Shutting down the
Using the SystemSeptember 2000 2-11CAUTION: Install a splash guard over the entrance area of the processor to prevent water and chemicals from enterin
Using the System2-12 September 2000CAUTION: Turn off the circuit breaker only after doing the soft shutdown. Otherwise, you could lose printer status
September 2000 3-13 System Operating ProceduresThis section provides the information you need to operate the KODAK PROFESSIONAL LED II Printer 20P.
System Operating Procedures3-2 September 2000Operating the PrinterOperator Control PanelThe operator control panel (OCP) for the printer allows you to
System Operating ProceduresSeptember 2000 3-3OCP Key/Light DescriptionsKey/LightKey /LED Indicator LightDescription/FunctionStart Key The Start key tu
System Operating Procedures3-4 September 2000MenuThe menu allows you to access other printer features. NOTE: To access the menu, the print queue must
System Operating ProceduresSeptember 2000 3-5Status MessagesStatus messages display on the LCD display of the OCP to indicate the status or current st
System Operating Procedures3-6 September 2000Loading Paper Into the Supply CassetteWARNING: Move the supply cassette from the printer to a table to lo
System Operating ProceduresSeptember 2000 3-7Loading Paper into the Supply Cassette1. Unlock the supply cassette.2. Open the supply cassette.3. If n
Safety RegulationsIMPORTANT: This equipment incorporates high-voltage components. Adequate safeguards and interlocks have been designed into this equi
System Operating Procedures3-8 September 2000TIP: Practice the following steps in the light with an empty cardboard core before you load a new roll of
System Operating ProceduresSeptember 2000 3-9IMPORTANT:Make sure that the right and left edges of the paper on the paper roll remain aligned. Do not a
System Operating Procedures3-10 September 2000When the paper cassette is locked, you can turn on the room lights.IMPORTANT:When moving the supply cass
System Operating ProceduresSeptember 2000 3-115. Align the slot on the bottom of the supply cassette with the plate on the bottom of the shelf and sl
System Operating Procedures3-12 September 2000CAUTION: If the paper does not load properly or a paper jam occurs, press Cancel. Remove any paper from
System Operating ProceduresSeptember 2000 3-13Reaching the End of the Roll of PaperWhen the end of the roll of paper is reached, the OCP displays one
System Operating Procedures3-14 September 2000Removing the ChadChad is wasted paper that is cut from the lead edge of the paper roll by the knife. It
System Operating ProceduresSeptember 2000 3-15Accessing the Printer Features Shutdown and RestartShutdown1. Select “Shutdown” from the main menu on th
System Operating Procedures3-16 September 2000Selecting the Target Pad Read Options1. Select “Setup” from the main menu on the OCP.2. Select “Ports”.3
System Operating ProceduresSeptember 2000 3-17Setting the Printer Time and DateSetting the Current Time1. Select “Setup” from the main menu on the OCP
Environmental RegulationsIMPORTANT: Always adhere to your local ordinances and regulations for disposal of paper, chemicals, filters, cleaning supplie
System Operating Procedures3-18 September 2000Selecting the Slug Width for the PaperYou can determine the width of the lead and trail edge borders on
System Operating ProceduresSeptember 2000 3-19Setting the Page Starts ValueThe value for “page starts” indicates the number of pixels between the back
System Operating Procedures3-20 September 2000Producing Borderless PrintsTo achieve borderless prints on both the front and back edges of the paper, y
System Operating ProceduresSeptember 2000 3-213. Adjust the page starts value to the calculated pixel value. If the white border is on the:• back edg
System Operating Procedures3-22 September 2000Accessing the Software Version NumberTo view the software version of the FEE, PEC and OPC circuit boards
System Operating ProceduresSeptember 2000 3-23Resetting the DefaultsResetting the ParametersThis procedure resets the parameters of the printer to the
System Operating Procedures3-24 September 2000Changing the Units of Measurement for Paper Sizes1. Select “Setup” from the main menu on the OCP.2. Sele
System Operating ProceduresSeptember 2000 3-25If the print job is sent to the printer with the Buffered/Deferred option, this indicates to the printer
System Operating Procedures3-26 September 2000Operating the ProcessorOperator Control PanelThe operator control panel (OCP) for the processor allows y
System Operating ProceduresSeptember 2000 3-27OCP Key/Light DescriptionsKey/LightKey /LED Indicator LightDescription/FunctionSet Key Pressing Set caus
Warranty InformationThe following warranty information pertains to equipment that is installed in the United States only. For equipment installed in c
System Operating Procedures3-28 September 2000Status MessagesStatus messages display on the LCD display of the operator control panel to indicate the
System Operating ProceduresSeptember 2000 3-29OCP On/Off LightThe on/off light switch for the OCP illuminates or deilluminates the entire OCP.
System Operating Procedures3-30 September 2000Operational ModesThere are three operational modes for the processor:• Operator• Key Operator• ServiceTo
System Operating ProceduresSeptember 2000 3-31Adjusting the Key Switch LockThe key switch lock is behind the front panel on the side of the OCP. The f
System Operating Procedures3-32 September 2000Processing a Control StripCAUTION: Loading the control strip feed box must be done in a darkroom in comp
System Operating ProceduresSeptember 2000 3-3310. Turn the knob on the control strip feed box clockwise with a steady slow motion until the processor
System Operating Procedures3-34 September 2000Viewing/Setting the Seven-Day TimerThe seven-day timer allows the processor to turn itself on and off au
System Operating ProceduresSeptember 2000 3-35Viewing/Setting the TemperaturesViewing the Temperature Settings1. Press Temperature on the OCP to acces
System Operating Procedures3-36 September 2000Viewing/Setting Replenishment SettingsViewing the Replenishment Rate1. Press Replenishment to access the
System Operating ProceduresSeptember 2000 3-37Entering the Flow Rate1. Measure the flow rate. See “Measuring the Flow Rate” above.2. Press Set twice t
September 2000 vii Table Of Contents About This Guide...
System Operating Procedures3-38 September 2000Displaying the Min Max Development TimeNOTE: The fastest and slowest development times, as recorded from
System Operating ProceduresSeptember 2000 3-39Controlling the Processor DriveTurning the Drive On1. Press Drive.2. Press Set.3. Press Drive.The drive
System Operating Procedures3-40 September 2000Loading the Default ValuesIMPORTANT: Record all processor settings before using this procedure. Reloadin
System Operating ProceduresSeptember 2000 3-41Setting the Development Time ToleranceA “DRIVE ERROR” message appears on the OCP when the development ti
September 2000 4-14 Maintaining the EquipmentThis chapter includes information you will need to maintain the KODAK PROFESSIONAL LED II Printer 20P a
Maintaining the Equipment4-2 September 2000Maintaining the PrinterDaily MaintenanceRemoving the ChadChad is the waste (fogged paper) that is cut from
Maintaining the EquipmentSeptember 2000 4-3Periodic MaintenanceReplacing the Air FilterThe air filter under the shoe should be replaced approximately
Maintaining the Equipment4-4 September 2000Maintaining the ProcessorDaily MaintenanceChemistry LevelsCheck that the chemistry in the each of the proce
Maintaining the EquipmentSeptember 2000 4-5CAUTION: To avoid having chemicals overflow from the effluent bottles, be sure that the volume of chemicals
viii September 2000Selecting SCSI Ports... 3-15Select
Maintaining the Equipment4-6 September 2000Operational ChecksCheck that the crossover assemblies and transport assemblies in the processor are install
Maintaining the EquipmentSeptember 2000 4-7Weekly MaintenanceChecking the Tension of the Main Drive ChainWARNING: Turn off the main power for the proc
Maintaining the Equipment4-8 September 2000Preventing Algae (for Wash Configuration)Add hot water to the top rollers in the wash area of the processor
Maintaining the EquipmentSeptember 2000 4-9Cleaning the Feed Table and the Processor Entrance SensorsWARNING: Turn off the main power to the processor
Maintaining the Equipment4-10 September 2000Replacing Chemical and Wash FiltersCheck the condition of the filters in the processor tanks. If necessary
Maintaining the EquipmentSeptember 2000 4-11Monthly MaintenanceMain Drive ChainWARNING: Turn off the main power to the processor on the operator contr
Maintaining the Equipment4-12 September 2000Cleaning the Tank and Dryer CoverClean the inside and outside of the tank and dryer cover with water and a
Maintaining the EquipmentSeptember 2000 4-13Periodic MaintenanceCleaning Chemical Residue BuildupThe processor should be cleaned regularly to prevent
Maintaining the Equipment4-14 September 2000Adding New ChemistryThe following information is a guideline for mixing new chemistry for chemical tanks i
Maintaining the EquipmentSeptember 2000 4-15Stabilizer: (EKTACOLOR PRIME Stabilizer and Replenisher)1. Pour 9 litres of water in a 10 litre mixing bot
September 2000 ixViewing/Setting Replenishment Settings... 3-36Viewing the Replenis
September 2000 5-15 Diagnostics and TroubleshootingThis chapter describes the error messages for the KODAK PROFESSIONAL LED II Printer 20P and the K
Diagnostics and Troubleshooting5-2 September 2000Printer Error Messages The following messages appear on the printer’s OCP when an equipment problem o
Diagnostics and TroubleshootingSeptember 2000 5-3Printer Paper PathThe paper path through the printer is illustrated below. Use this information when
Diagnostics and Troubleshooting5-4 September 2000Printer Error MessagesIf the error message continues to occur after implementing the possible solutio
Diagnostics and TroubleshootingSeptember 2000 5-515 timers busy A low level motor move command was issued while the timer motor was in use.Wait for t
Diagnostics and Troubleshooting5-6 September 200065 proc stopped taking sheetThe paper did not disappear from the sheet transport area within the expe
Diagnostics and TroubleshootingSeptember 2000 5-780 paper at shoe entr not detectedDuring paper loading, the lead edge of the paper was not detected a
Diagnostics and Troubleshooting5-8 September 200092 knife back not detected Knifeback switch was not detected after moving knife from front to back.Ch
Diagnostics and TroubleshootingSeptember 2000 5-9132 knife at both limits Both the front and back knife limit switches are actuated.Call for service.1
© 2020, manymanuals.com. All rights reserved. | 2.331 s |
 Manymanuals.com
 Manymanuals.de
 Manymanuals.fr
 Manymanuals.it
 Manymanuals.pl
 Manymanuals.cz
 Manymanuals.es
 Manymanuals-pt.com
Comments to this Manuals