Kodak M23 User Manual
Browse online or download User Manual for Cameras Kodak M23. Kodak M23 User Manual
- Page / 68
- Table of contents
- TROUBLESHOOTING
- BOOKMARKS
- KODAK EASYSHARE 1
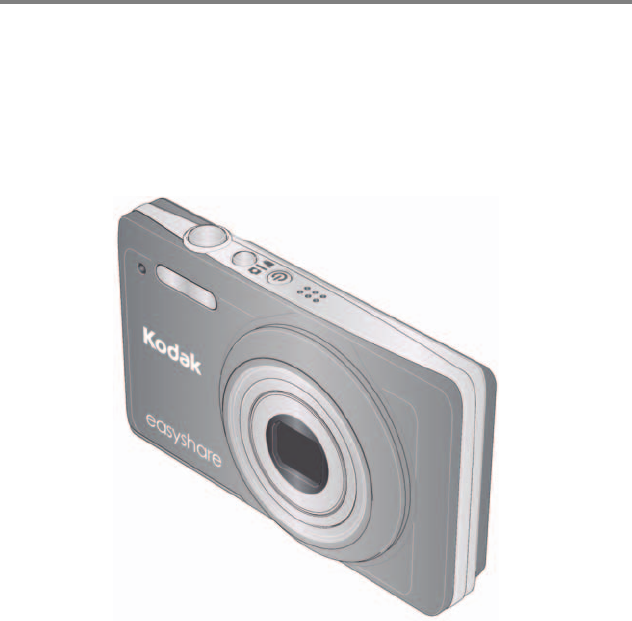
- Camera / M23 1
- Quick start 3
- Front view 4
- Back view 5
- Table of contents 1 6
- Table of contents 7
- 1 Setting up your camera 8
- Charging the battery 9
- If you have this charger 10
- Setting up your camera 11
- Turning on the camera 12
- 2 Taking pictures/videos 14
- Taking a video 15
- Watch the battery level 16
- Adjusting LCD brightness 17
- Using the optical zoom 17
- Using the flash 18
- Using different modes 19
- Using Scene (SCN) modes 20
- Using Program mode 21
- Using shortcuts 22
- Using the self-timer 23
- Using burst 23
- Taking panoramic pictures 24
- Sharing and tagging pictures 25
- Tagging pictures 27
- Using the keyboard 28
- Tagging with keywords 29
- 4 Reviewing and editing 30
- Deleting pictures/videos 31
- Magnifying a picture 32
- Reviewing and editing 33
- 27 www.kodak.com/go/support 34
- Cropping pictures 36
- Rotating pictures 37
- Editing videos 38
- Making a video action print 39
- 5 Doing more with your camera 40
- Doing more with your camera 41
- 35 www.kodak.com/go/support 42
- Using the Setup menu 43
- Install software, then share 46
- Printing pictures 47
- Ordering prints online 48
- 7 Troubleshooting 49
- 43 www.kodak.com/go/support 50
- Picture quality problems 51
- Getting help on the Web 52
- 8 Appendix 53
- Appendix 54
- Care and maintenance 55
- Storage capacities 56
- Important safety instructions 56
- Extending battery life 57
- ° F (5° C). When using 57
- Limited warranty 58
- Regulatory compliance 59
- Canadian DOC statement 60
- Australian C-Tick 61
- VCCI Class B ITE 61
- China RoHS 61
- Russian GOST-R 62
- Korean Li-Ion Regulatory 62
- Korean Class B ITE 63
Summary of Contents
KODAK EASYSHARECamera / M23Extended user guidewww.kodak.comFor help with your camera:www.kodak.com/go/m23support
3 www.kodak.com/go/supportSetting up your cameraUsing the external battery chargerYou can charge the Li-Ion battery whenever necessary.Purchase extra
Setting up your camerawww.kodak.com/go/support 4Charge via your computer’s USB portYou can charge the Li-Ion battery whenever necessary.IMPORTANT: The
5 www.kodak.com/go/supportSetting up your cameraTurning on the cameraSetting the language and date/timeNOTE: To change language in the future, use th
Setting up your camerawww.kodak.com/go/support 6Storing pictures on an accessory SD or SDHC CardYour camera has internal memory. We strongly recommend
7 www.kodak.com/go/support2 Taking pictures/videosTaking pictures1 The camera turns on in Smart Capture mode. (If it’s in a different mode, press the
Taking pictures/videoswww.kodak.com/go/support 8Taking a video1 Press the Mode button.2 Press until the LCD displays Video , then press OK.3 To tak
9 www.kodak.com/go/supportTaking pictures/videosUnderstanding the picture-taking iconsWatch the battery levelDon’t miss out on great pictures and vide
Taking pictures/videoswww.kodak.com/go/support 10Using the optical zoom1 Use the LCD to frame your subject.2 To zoom in, press Telephoto (T). To zoom
11 www.kodak.com/go/supportTaking pictures/videosUsing the flashPress the Flash button repeatedly until the LCD displays the desired flash mode.Flash
Taking pictures/videoswww.kodak.com/go/support 12Using different modesPress the Mode button, then until the LCD displays the mode that best suits yo
Eastman Kodak CompanyRochester, New York 14650© Eastman Kodak Company, 2011All screen images are simulated.Kodak, EasyShare, Perfect Touch, and Pulse
13 www.kodak.com/go/supportTaking pictures/videosUsing Scene (SCN) modesChoose a Scene mode—for great pictures in practically any situation.1 Press th
Taking pictures/videoswww.kodak.com/go/support 14Using Program modeProgram mode gives access to these settings:1 Press the Mode button .2 Press to
15 www.kodak.com/go/supportTaking pictures/videosUsing shortcutsYour camera has a clean, uncluttered interface. For quick access to the most popular c
Taking pictures/videoswww.kodak.com/go/support 16Using the self-timerUse the self-timer when you want to be included in a picture, or to ensure a stea
17 www.kodak.com/go/supportTaking pictures/videosTaking panoramic picturesUse panorama to “stitch” up to 3 pictures into a panoramic scene.NOTE: Only
www.kodak.com/go/support 183 Sharing and tagging picturesSharing pictures/videos through social networksIt’s never been easier to share pictures on y
19 www.kodak.com/go/supportSharing and tagging picturesChoose which social networking sites to display on your cameraYou can show/hide social networki
Sharing and tagging pictureswww.kodak.com/go/support 20Tagging picturesTag pictures to make them easy to find, later. You can tag pictures in 2 ways:
21 www.kodak.com/go/supportSharing and tagging picturesNeed to update a name?If you meet a new friend—James—but you already have pictures tagged with
Sharing and tagging pictureswww.kodak.com/go/support 22Tagging with keywords1 Press the Review button, then to find a picture to tag.2 Press the Me
Product featureswww.kodak.com/go/support iQuick start1Charge until the light stops blinking.23Set language, date/time.4Take pictures, videos.5Install
23 www.kodak.com/go/support4 Reviewing and editingReviewing pictures/videos1 Press the Review button.2 Press for previous/next picture/video. To e
Reviewing and editingwww.kodak.com/go/support 24Deleting pictures/videos1 Press the Review button.2 Press for previous/next picture/video.3 Press t
25 www.kodak.com/go/supportReviewing and editingViewing pictures/videos in different waysMagnifying a picture1 Press Telephoto (T) to magnify 2X–8X.2
Reviewing and editingwww.kodak.com/go/support 26A smarter way to find and enjoy your pictures Tag pictures—by people or keywords—to make them easy to
27 www.kodak.com/go/supportReviewing and editingUnderstanding the review icons* For more about shortcuts, see page 15.Know when your battery needs cha
Reviewing and editingwww.kodak.com/go/support 28Displaying pictures/videos on a televisionYou can display pictures/videos on a television, computer mo
29 www.kodak.com/go/supportReviewing and editingUsing the menu button in review1 Press the Review button, then the Menu button.2 Press to choose
Reviewing and editingwww.kodak.com/go/support 30Rotating picturesYou can rotate a picture to portrait or landscape orientation.1 Press the Review but
31 www.kodak.com/go/supportReviewing and editingEditing videosTrimming a videoYou can remove the start or end from a video, saving only the desired po
Reviewing and editingwww.kodak.com/go/support 32Making a video action printFrom a video, you can make a 9-up picture, suitable for a 4 x 6-inch (10 x
ii www.kodak.com/go/supportProduct featuresFront viewLensMicrophoneFlashSelf-timer, Video, Battery Charging lightPower Mode Shutter SpeakerBattery com
33 www.kodak.com/go/support5 Doing more with your cameraUsing the menu button in picture-taking modesYou can change settings to get the best results f
Doing more with your camerawww.kodak.com/go/support 34Exposure CompensationMake a picture lighter or darker. (Available in Program and Panorama modes.
35 www.kodak.com/go/supportDoing more with your cameraWhite BalanceChoose your lighting condition. (Available only in Program and Panorama modes.)Auto
Doing more with your camerawww.kodak.com/go/support 36Video settings (available when the camera is in a Video mode)Using the Setup menuUse Setup to cu
37 www.kodak.com/go/supportDoing more with your cameraLCD BrightnessChoose LCD brightness during picture/video capture. (During Review, the LCD is set
Doing more with your camerawww.kodak.com/go/support 38For menu settings in Review, see page 29.FormatCAUTION:Formatting deletes all pictures/videos, i
39 www.kodak.com/go/support6 Install software, then shareInstall software, transfer picturesInstall KODAK Software—so it’s easy to transfer and share
Install software, then sharewww.kodak.com/go/support 40Printing picturesDirect printing with a KODAK All-in-One PrinterIMPORTANT: To print using PICTB
41 www.kodak.com/go/supportInstall software, then shareDisconnecting the camera from a KODAK All-in-One Printer1 Turn off the camera and printer.2 Dis
www.kodak.com/go/support 427 TroubleshootingCamera problemsStatus SolutionCamera does not turn on Make sure the battery is installed correctly (see
www.kodak.com/go/support iiiBack viewOK ZoomLCDShare USB portDeleteStrap postMenuInfoFlash buttonReview
43 www.kodak.com/go/supportTroubleshootingComputer/connectivity problemsDirect printing (PICTBRIDGE enabled printer) problemsMemory card not recognize
Troubleshootingwww.kodak.com/go/support 44Picture quality problemsStatus SolutionPicture is not clear To automatically set exposure and focus, press
45 www.kodak.com/go/supportTroubleshootingGetting help on the WebCameraGet support for your product (FAQs, troubleshooting information, arrange for re
www.kodak.com/go/support 468 AppendixSpecificationsCCD—1/2.3-typeEffective pixels—14 MP (4352 x 3264) LCD—2.7 in. (6.9 cm) LCD; 230K pixels; 4:3 aspe
47 www.kodak.com/go/supportAppendixProgram mode: Auto 80–400; manual 80, 100, 200, 400, 800, 1000Exposure metering—TTL-AE; Face Priority, Multi-Zone,
Appendixwww.kodak.com/go/support 48Power—KODAK Li-Ion Rechargeable Digital Camera Battery KLIC-7006; 5V AC-to-USB battery charging; USB charging via c
49 www.kodak.com/go/supportAppendixStorage capacitiesThe LCD displays the approximate number of pictures (or minutes/seconds of video) remaining. For
Appendixwww.kodak.com/go/support 50 Remove the battery when the product is stored for an extended period of time. In the unlikely event that battery
51 www.kodak.com/go/supportAppendixLimited warrantyKodak warrants its digital cameras and accessories (excluding batteries) to be free from malfunctio
Appendixwww.kodak.com/go/support 52specified on your Kodak product packaging. The option of repair, replacement, or refund is Kodak's only obliga
iv www.kodak.com/go/supportTable of contents 11 Setting up your camera ...1Att
53 www.kodak.com/go/supportAppendixinterference to radio communications. However, there is no guarantee that interference will not occur in a particul
Appendixwww.kodak.com/go/support 54CEHereby, Eastman Kodak Company declares that this KODAK Product is in compliance with the essential requirements a
55 www.kodak.com/go/supportAppendixRussian GOST-RKorean Li-Ion RegulatoryEastman Kodak CompanyRochester, NY 14650
Appendixwww.kodak.com/go/support 56Korean Class B ITE
57 www.kodak.com/go/supportIndex 1AA/V out, 28about this camera, 38accessoriesbattery, 50buying, 45SD/SDHC Card, 6add keywords, names, 21AF control (S
www.kodak.com/go/support 58Indexdisplay, brightness, 10disposal, recycling, 48downloadKODAK Software, 39download pictures, 39Eedit videos, 31emailing
59 www.kodak.com/go/supportIndexMmagnify a picture, 25maintenance, camera, 48make picture from video, 31making a video action print, action print, vid
www.kodak.com/go/support 60IndexQquickview, using, 8Rrecognizing faces, 20recording light, irecycling, disposal, 48regulatory information, 52repair,
61 www.kodak.com/go/supportIndextipsbattery guidelines, 50care & maintenance, 48transfer pictures, 39trash can, deleting, 8trimming a video, 31tro
Table of contentswww.kodak.com/go/support vA smarter way to find and enjoy your pictures...26Understanding
1 www.kodak.com/go/support1 Setting up your cameraAttaching the strapLoading the KLIC-7006 batteryPurchase extra batteries www.kodak.com/go/accessori
Setting up your camerawww.kodak.com/go/support 2Charging the batteryUsing the in-camera battery chargerYou can charge the Li-Ion battery whenever nece
More documents for Cameras Kodak M23


Related products and manuals for Cameras Kodak M23
 (56 pages)
(70 pages)
(65 pages)
(29 pages)
(56 pages)
(70 pages)
(65 pages)
(29 pages)
 (2 pages)
(72 pages)
(64 pages)
(28 pages)
(68 pages)
(29 pages)
(100 pages)
(77 pages)
(102 pages)
(27 pages)
(23 pages)
(68 pages)
(29 pages)
(34 pages)
(62 pages)
(79 pages)
(2 pages)
(72 pages)
(64 pages)
(28 pages)
(68 pages)
(29 pages)
(100 pages)
(77 pages)
(102 pages)
(27 pages)
(23 pages)
(68 pages)
(29 pages)
(34 pages)
(62 pages)
(79 pages)
© 2020, manymanuals.com. All rights reserved. | 0.329 s |
 Manymanuals.com
 Manymanuals.de
 Manymanuals.fr
 Manymanuals.it
 Manymanuals.pl
 Manymanuals.cz
 Manymanuals.es
 Manymanuals-pt.com
Comments to this Manuals